Saturday, October 19, 2013

Drill #18 Going Wild About Wood


Drill #18 
Sketchy Saturday
Going Wild About Wood!

The Obstacle: 
You must use wood embellishments.


Guidelines:
*Create a NEW layout as of Oct 19, 2013 –No Back Linking
*Add your entry to our InLinkz box on the left side of the blog to be eligible for the monthly prize.
*Please add a link back to this challenge post when posting your layout on blog/galleries etc. 
*can be combined with other non–sketch challenges.

Now remember This month we are lucky enough to have Creative Embellishments as our sponsor!


Check out what the Design Team did with the sketch today! Makes sure you pay close attention to Doris & Nicole's layouts they are packed full of Creative Embellishments Products!  

Make sure to click on their names below their layouts to head to head to their personal blogs for extra details! 

Creative Embellishments Wood Cuts used on this page: Geek/Chic Glasses. CE laser cut chipboard used on this page: Social Hash TagsBubbly Corner pieces (part of a set), Small Frame from the Together Frame Set, Medium Frame from the You Rock Frame Set, Photo Slide from the View Master set.

Creative Embellishments Wood Cuts used on this page: Hearts and Arrows. CE laser cut chipboard used on this page: Mini Ornate Title/Word FrameCircles panel, Medium frame from the You Rock Frame Set, Medium frame from the Time Flies Frame Set.

Bev


Becci


Deborah


Claude Campeau


Now it's your turn to cut it up! Just make sure you link up your project by October 28th at 11:59PM EST.

Thanks for stopping by today!

One last Thing before you head to your scrappy space.. Did you notice our new look? 

We would love to hear what you think!! So stop by our Facebook Page LIKE US and let us know what you think! We will be randomly rewarding comments all week long! 

Wednesday, October 16, 2013

Happy Hump day!


Happy Hump Day Everyone!
 Deborah is up and she has some beautiful
flowers to share with you!


Good morning Scrappy-Happy Friends!!

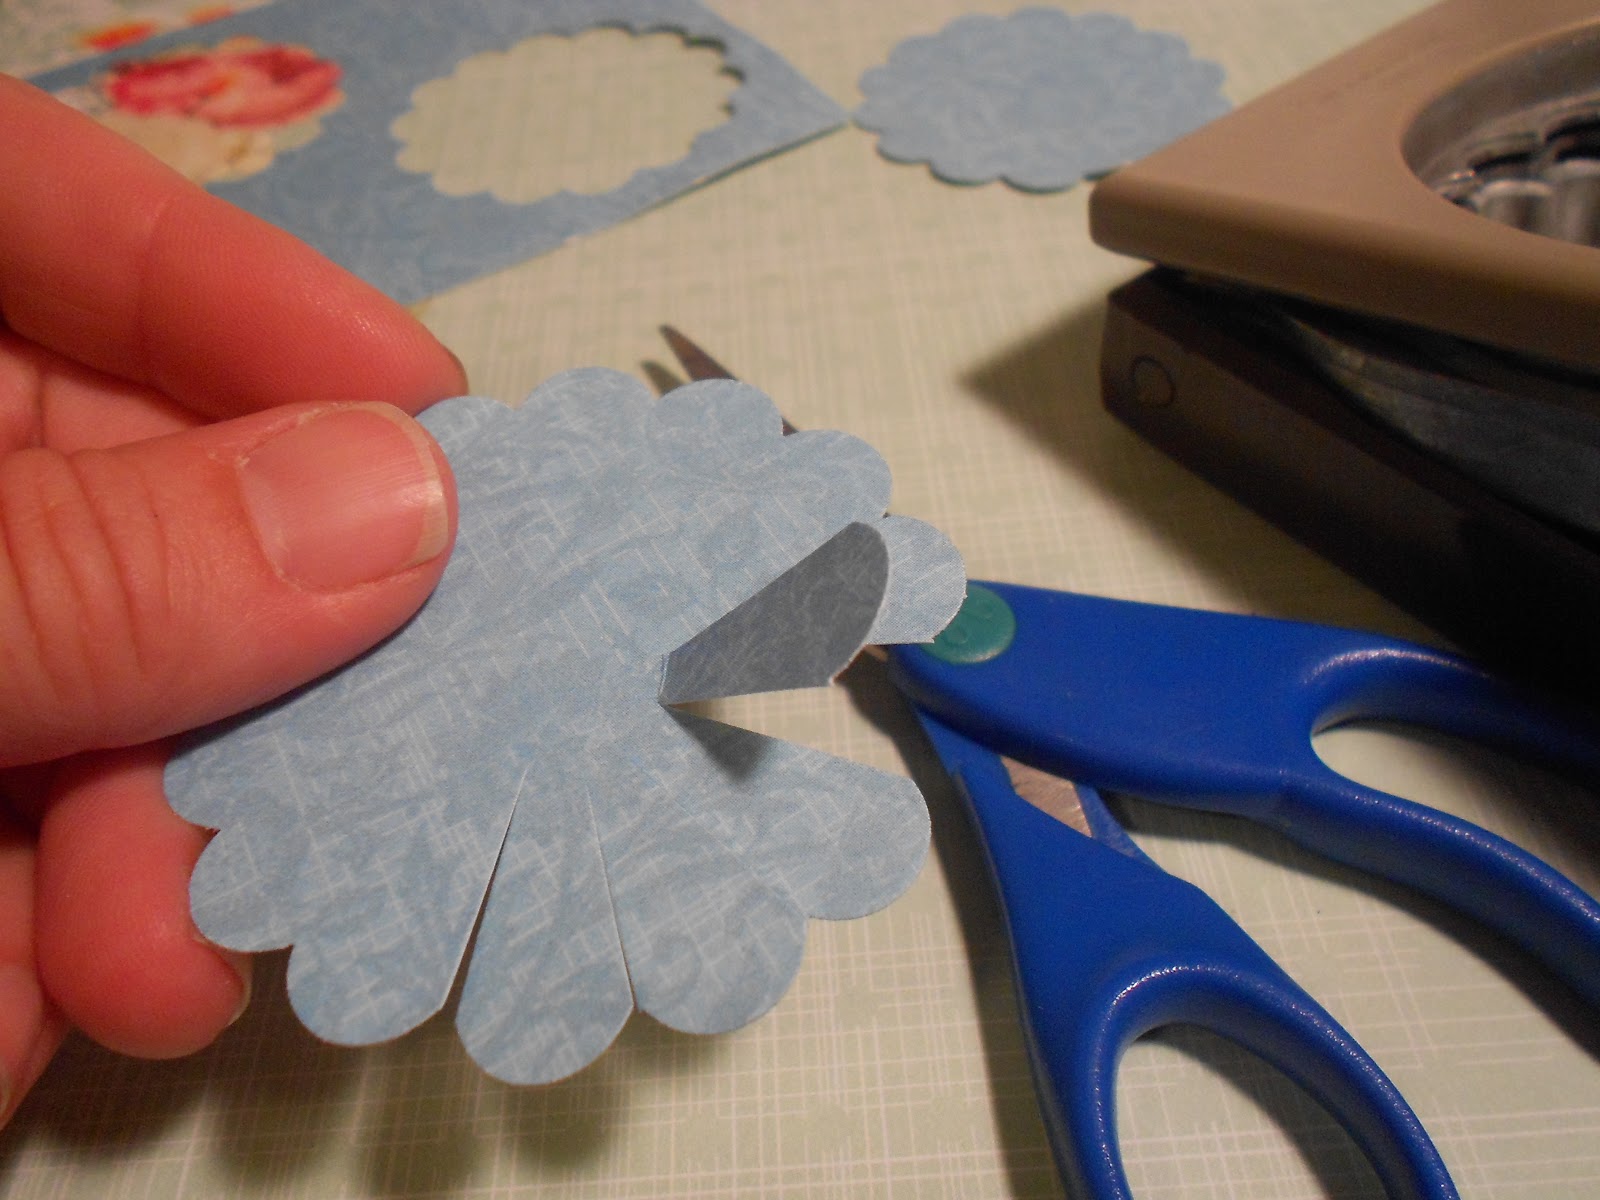
Wanted to share with you all how I the flowers that you may have seen on several of my layouts lately.  They are super easy and take less than 10 minutes to create.

Supplies that I used:

2 3/8" scalloped circle punch from Stampin' Up!
scissors
brads
colorful scrapbook paper


Punch a scalloped circle (or two!)

Cut "petals" into the circle...

all the way around ...

Begin bending the petal edges back.


This is what it looks like when the are all bent.

Turn the flower over like this:

Press a brad through the center and "pinch" the flower to conform to your desired look.

Ta-dah!

On a project:

Thank you for stopping by and have a scrappy-happy day!

Saturday, October 12, 2013

Basic Training- Mask it Up!

Basic Training

Mask it UP!


Happy Saturday!!! 

Michele here with October's Basic Training.  I have a BUNCH of different techniques to show you using a mask.   Masks are a fun tool to use and you can create so many different looks on your projects with one.  I am going to be demonstrating with one of my absolute favorite masks from UmWow Studio.  It is the star confetti mask and you can find it here.


Great mask right?!!! 

OK, let's get started with ink.


This one is pretty easy, just lay the mask where you want your inked background and apply ink over the mask.  I also took a marker and outlined and colored some of the stars.  You could do this as a separate technique also!!

Now mist.


For this one I used washi to tape the mask in place so it would not lift up while I was spraying.  I also didn't want to waste this beautiful glimmer mist so I used the sprayed mask as a stamp to create a different kind of background.

And then heat embossing.


I used embossing ink on the mask and also stamped with the area that had the embossing ink all over it to create a positive and negative with this technique also.  Sprinkle with embossing powder and heat it up!!

Next we have gesso.

I taped the mask for this one too.  Took a little gesso right on my finger and dabbed it around the mask.  If you want to speed up the drying after you remove the mask hit the area with your heat gun.

How about modeling paste??


For this one I use my finger also but instead of dabbing I smear the paste across the mask.  I love the depth with this technique!!  You can also speed up the drying with your heat gun and even use ink or stain to color the area.

What about a resist??


For this one I use a combination of Mod Podge and paint.  Dab it through your mask and heat dry with your heat gun.  Then spray with your favorite mist.  You can remove the mist from the masked area with a paper towel.

And finally embossing.
  

I ran this through my Big Shot with the multipurpose platform.  You may have to shim to get a good emboss.

These techniques add such dimension and character to your projects!!  You will usually find at least one of these on everything I do!!!  I will look forward to seeing what you do with one or all of these little tricks.  Make sure you link up your project for a chance to win our October drawing, every qualifying project gets you an entry!!  Share, share, share I want to see your creations!!!

Thanks for spending part of your Saturday with me!!

Michele

Wednesday, October 9, 2013

Its time!!


Hi everyone! It's Venetia here and it's another Wednesday! I am still working on plaques to place about my room at work.

This week I wanted to share this one which is a reminder I need. "Now it's time!"

When I think of how many thing I push aside, I realize the time to do most of them is at that moment. If I spent more time doing and less time thinking about doing, I am sure I'd me amazed at the results.

So I challenge you for today- Wednesday to be inspired and make the time now for something you want.


Thanks for stopping by today!
 
See you Saturday for Basic Training!!
 
-Venetia

Saturday, October 5, 2013

Drill #17 Fussy Cutting

First Just a quick note about some changes here at S.W.A.T. Going forward we will be having one monthly prize. This prize will be a random draw from all entries that month. Both Drills will still end the 28th of the month and you are welcome to enter both Drills to increase you odds of winning.

Additionally I would like to remind our international players that as stated in our "Fine Print" we are only able to ship within the US. If you live outside the US you will be expected to pay any additional postage to cover the full international postage rate. **On occasion a gift card my be substituted.

Drill# 17
Fussy Cutting!

But what is fussy cutting you might ask? Put simply, Fussy Cutting is just cutting out intricate paper details by hand for your scrapbook projects. If you need some tips on Fussy cutting check out this blog post.


This month we are lucky enough to have Creative Embellishments as our sponsor. 

Creative Embellishments is a new family owned company that was created by Michael and Nicolle Kramer. We are a husband and wife team who design and manufacture unique, high quality  chipboard and wood products. It is our mission is to offer fun and inspiring products to bring out your inner creativity that you can add to any project. In the near  future we will be expanding into other mediums such as rubber/acrylic stamps and acrylic embellishments. Please stop over to the Creative Embellishments store and have a look around.

This Month's Prize:

Now lets see what the S.W.A.T Team cut up for your inspiration!


Now it's your turn to cut it up! Just make sure you link up your project by October 28th at 11:59PM EST.

Thanks for stopping by today!

Wednesday, October 2, 2013

Winners!!!

Here is a little Hump Day Fun for you!!!
 
From our very talented Becci!
Check out this amazing watercolor card that she has created!
 
 
Now its time to celebrate the winners!

As always before that we want to thank everyone who entered the Drills. We spend a lot of time going through each and every entry, and were so impressed and with the submissions!
 
We hope that you will join us again this Saturday for Drill #17!


But first, let's celebrate September's winners!
 
Drill#15

Drill# 16
 
Please contact us to collect your 3 Scrappy Boys Gift Card!

Thank you all again for sharing your amazing

talent with us! We hope that you had fun!


See You Saturday!!


Please contact us by email at: swatscrappygirl@gmail.com


All prizes must be claimed October 15th and used with in 120 days.